
Plasticity to Houdini 21 recipe
I’ve been using a lot Plasticity lately. It’s a simple CAD tool for surface modeling – much easier than Fusion 360 or MOI. I can do modeling with booleans and curves there much faster.
Then I import the geometry into Houdini, and usually my import process looks like this:
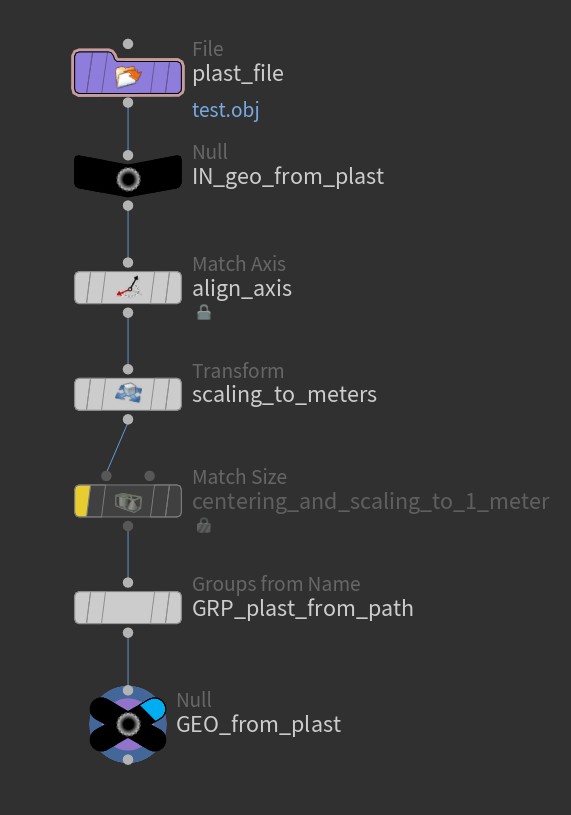
- Align the axis to the only correct way: Y is up, Z points forward to the viewer, and X points right.
- Scale to meters.
- Use a Match Size node in case I modeled without real-world dimensions.
- If you name your layers in Plasticity they will come into Houdini as a “path” attribute, so you can easily convert them to groups with the Groups from Name node.
To make this transition as easy as possible I use the new Recipes system (added in Houdini 20.5). To share those recipes between my different workstations, I created a recipes.json file inside the Houdini packages folder with this content:
{
  "hpath": "path_to_your_cloud_folder/Documents/Houdini/recipes_folder",
  "env": [
    { "HOUDINI_CUSTOM_RECIPE_DIR": "path_to_your_cloud_folder/Documents/Houdini/recipes_folder" },
    { "HOUDINI_CUSTOM_RECIPE_LIBRARY": "custom_recipes" }
  ]
}
In this setup, when you save a new tool as a recipe, Houdini automatically locks the Save To field to Custom File Path, pointing to:
path_to_your_cloud_folder/Documents/Houdini/recipes_folder/olts/custom_recipes.hda
Here’s example of another recipe that helps process low- and high-poly meshes for baking in Marmoset:
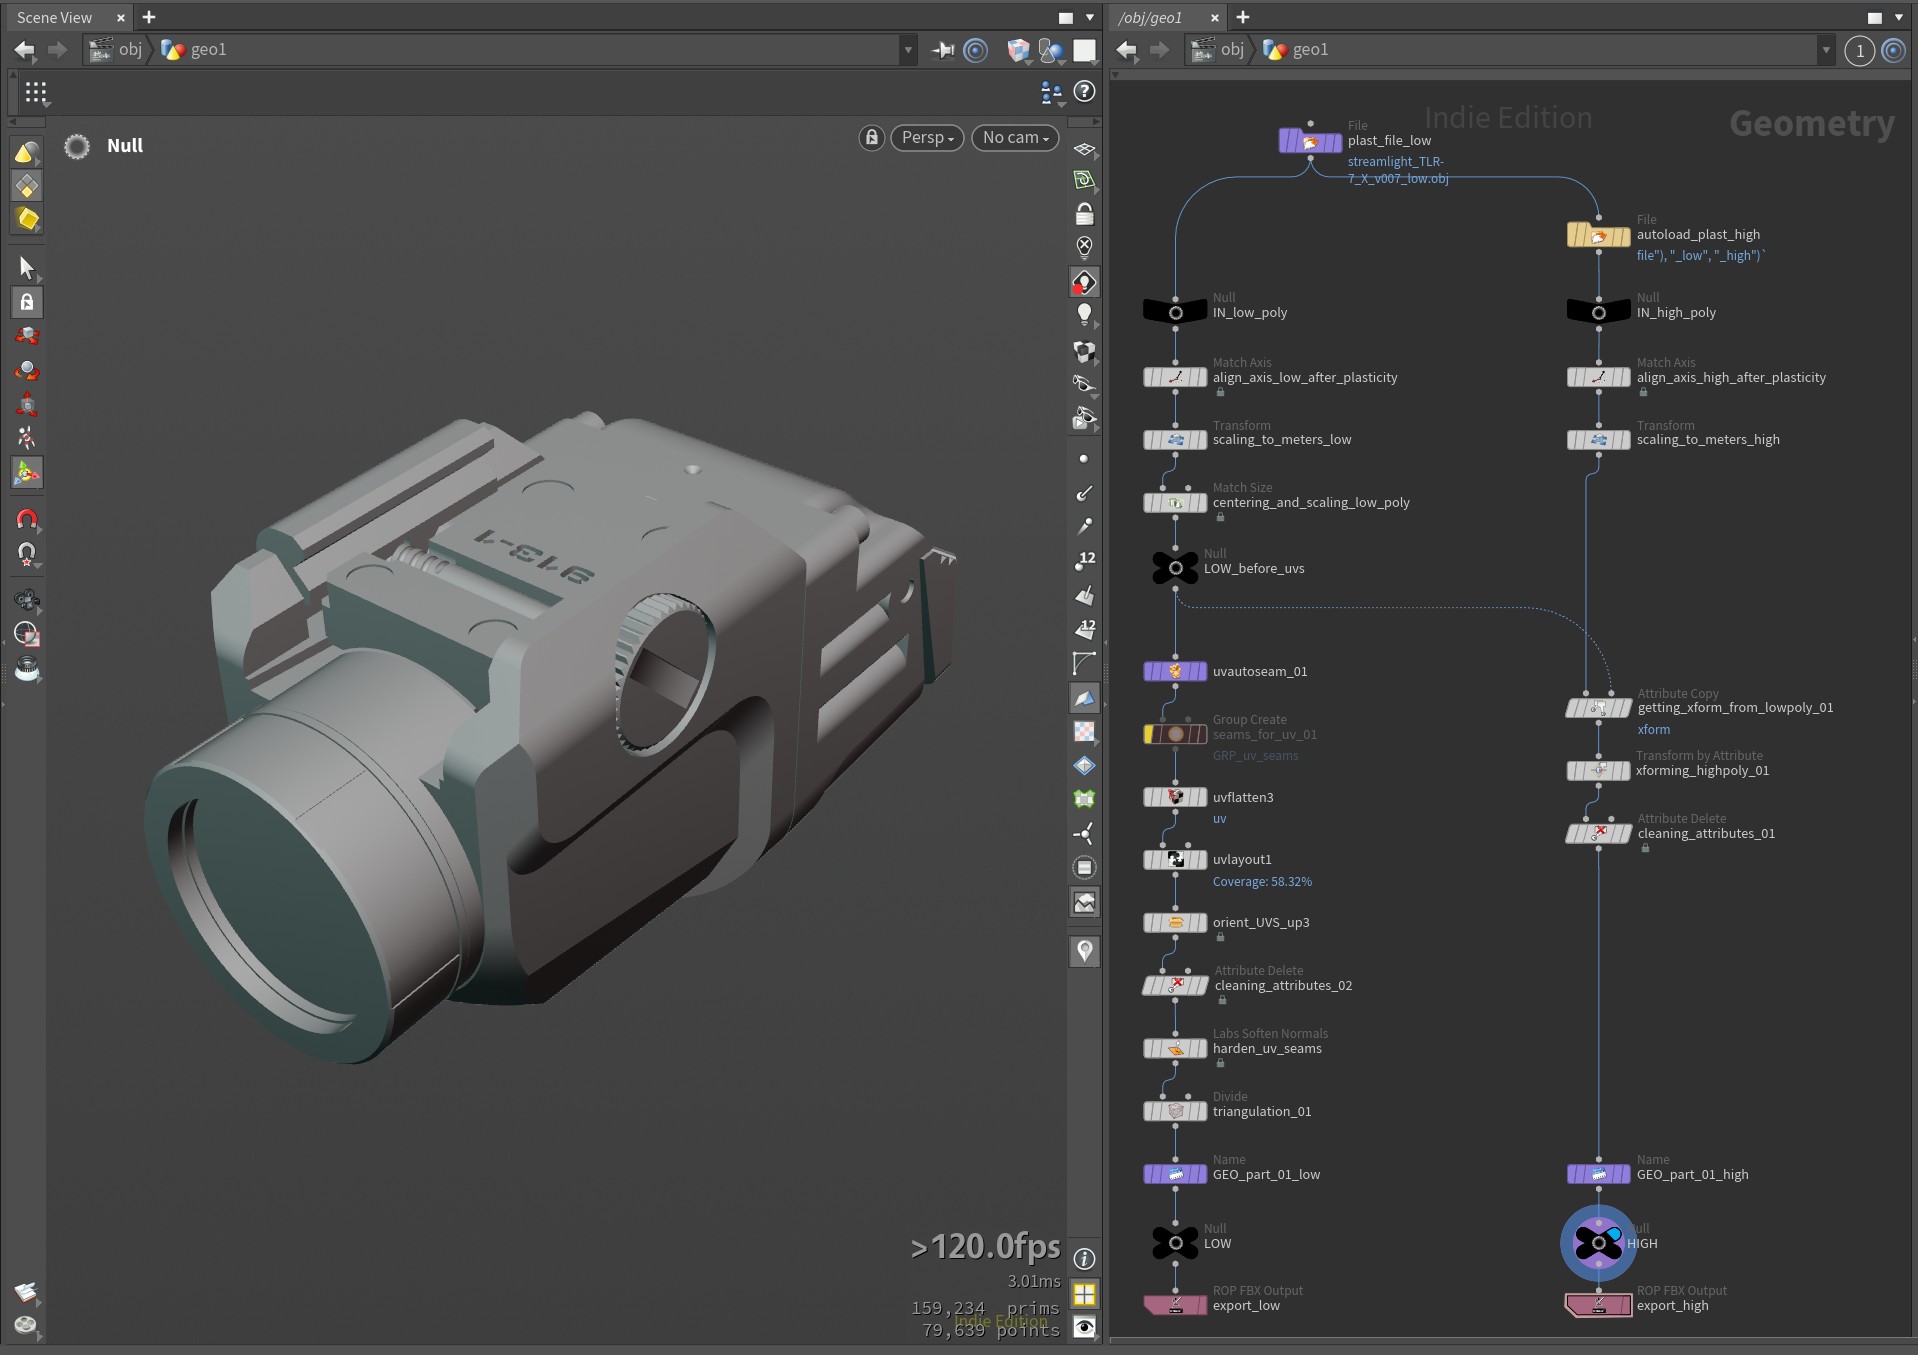
I’ll post more details about this project later, but the main idea is to use crude low-res geo from Plasticity, clean it up in Houdini, and at the same time import mid-poly. Then, use it in combination with Marmoset’s rounded edge baking.
No more micro-beveling inside Plasticity or ZBrush.