Photoindra

Modeling low poly pirate ship in 3D

Timelapse of modeling low poly pirate ship in 3d using Houdini, Zbrush, Substance Painter, RizomUV and Redshift:

If you prefer video on youtube with chapters you can watch it here.

Small concept drawing that you see in timelaps I found on pinterest quite a while ago. Sadly I don’t know the author.
You can rotate model in your browser here:

I also passed geometry to Meta Spark Studio to make an IG filter.
Here is link to open filter in Instagram:

If you want to do that there are couple of things to remember:

 No comments    528   11 mon   3dmodeling   animation   modeler   process   rizomuv

Search and replace paths in Houdini

If you want to search and replace paths in multiple locations use Windows -> Hscript Textport window

and write:

opchange \$DOWNLOADS"/wetransfer" \$JOB"/geo"

Backslash before variables will allow you to keep variables ($JOB and $DOWNLOADS in this case) and not expand them to full path.

Another case: you imported FBX with materials. You can move them to mat context and change path with this:

opchange ../../materials /mat

Another example: on windows machine for some reason textures are using absolute paths and I want to change them all to the root of the job project:

opchange "C:/Users/user_name/Dropbox/Work/project_name" \$JOB

Documentation:
https://www.sidefx.com/docs/houdini/commands/opchange.html

 717   2023   houdini

Zbrush lowpoly modeling and polygroups.

If you ever wondered why during polymodeling in zbrush you keep selecting several polygroups by CTRL+Shift clicking on only one:
Zbrush for most of brushes and selections uses vertices. And if your polygon doesn’t have any other polygon in same polygroup next to vertex that you clicked – it just selects also next polygoup.

So in this case you can use Select Lasso tool and click on one edge to hide full polygon loop. And then invert the visibility by CTRL+Shift dragging outside of mesh:

 568   2022   3dmodeling   zbrush
 718   2022   houdini   modeler

Houdini – random coloring from image palette.

I was trying to optimize my coloring process for a project. And here is where I got right now:

Coloring process:

  1. Get palette that I want as a screenshot from here:
    https://paletton.com/#uid=60B0u0kllzcboPZgUH4pEuxt-pp
  2. Convert image to Utility-Texture_sRGB with target color space ACEScg using PYCO ColorSpace converter. (I still need to make some more test on this part by using this .exrs files as emission texute to compare colors with reference).
    https://pyco.gumroad.com/l/pycocs
    Free with the code free at checkout.
  3. From github you can install Color Palette Ramp – a Houdini HDA that creates a ramp based on a color palette from an image.
    https://github.com/jamesrobinsonvfx/colorpaletteramp
  4. In Houdini using that HDA (colorpaletteramp) on SOP level create a ramp. If I got image from Paletton webpage then I use Stops -> 20. But something around 10 works great for other images.
  1. With OD Tools you can right click on result and “Palletize Ramp [OD]” to make colors separation constant and look more like palette instead or gradient. You can get OD Houdini Shelf Tools 2021 for $100 here:
    https://origamidigital.com/cart/index.php?route=product/product&manufacturer_id=11&product_id=66
  1. You can save this ramp in your OD Asset library for future use.
  1. To color geometry based on disconnected pieces: first use “Connectivity” node on points to create integer attribute called id. Then use “Attribute Adjust Color” node with Adjustment Value -> Pattern type set to Random. Randomization By -> Custom attribute. Custom Attribute -> id. Then with changing seed parameter you can get random options of color combinations.

Results from 3 different ramps:

 872   2022   3dmodeling   houdini

Hunting for likes

Small personal project that I made in Houdini testing Axiom GPU solver. Idea is that we always hunting for likes and “hearts”, setting traps with hot topics.
Looped video with music:

Work in progress:

Stills:

 593   2022   animation   houdini

Destiny 2 – Russian clan – GOT

Я в Дестини играю с 2014 года. С длинными паузами между заходами. Но она все так-же радует. Для меня это как спорт. Какая разница, смотришь ли ты футбольный матч по телеку или матч по “испытанию осириса”, где сумасшедший выходит один против троих и выигрывает безупречно семь раундов?
Одна из самых красивых и сложных частей игры доступна только командным игрокам. Недавно записался в русско-говорящий клан. GUARDIANS OF THE TRUTH [GOT]. Очень приятные ребята. Все показывают, спокойно и доступно объясняют. Я, как новичку и полагается, иногда туплю. Если вы гоняете в дестини иногда по выходным – добро пожаловать.

Ссылка на наш клан на сайте Bungie:
https://www.bungie.net/ru/ClanV2?groupid=2749474

Ccылка в Discord:
https://discord.gg/kkESWJ7

 591   2022   destiny   gaming

Shaman – Houdini vs Blender

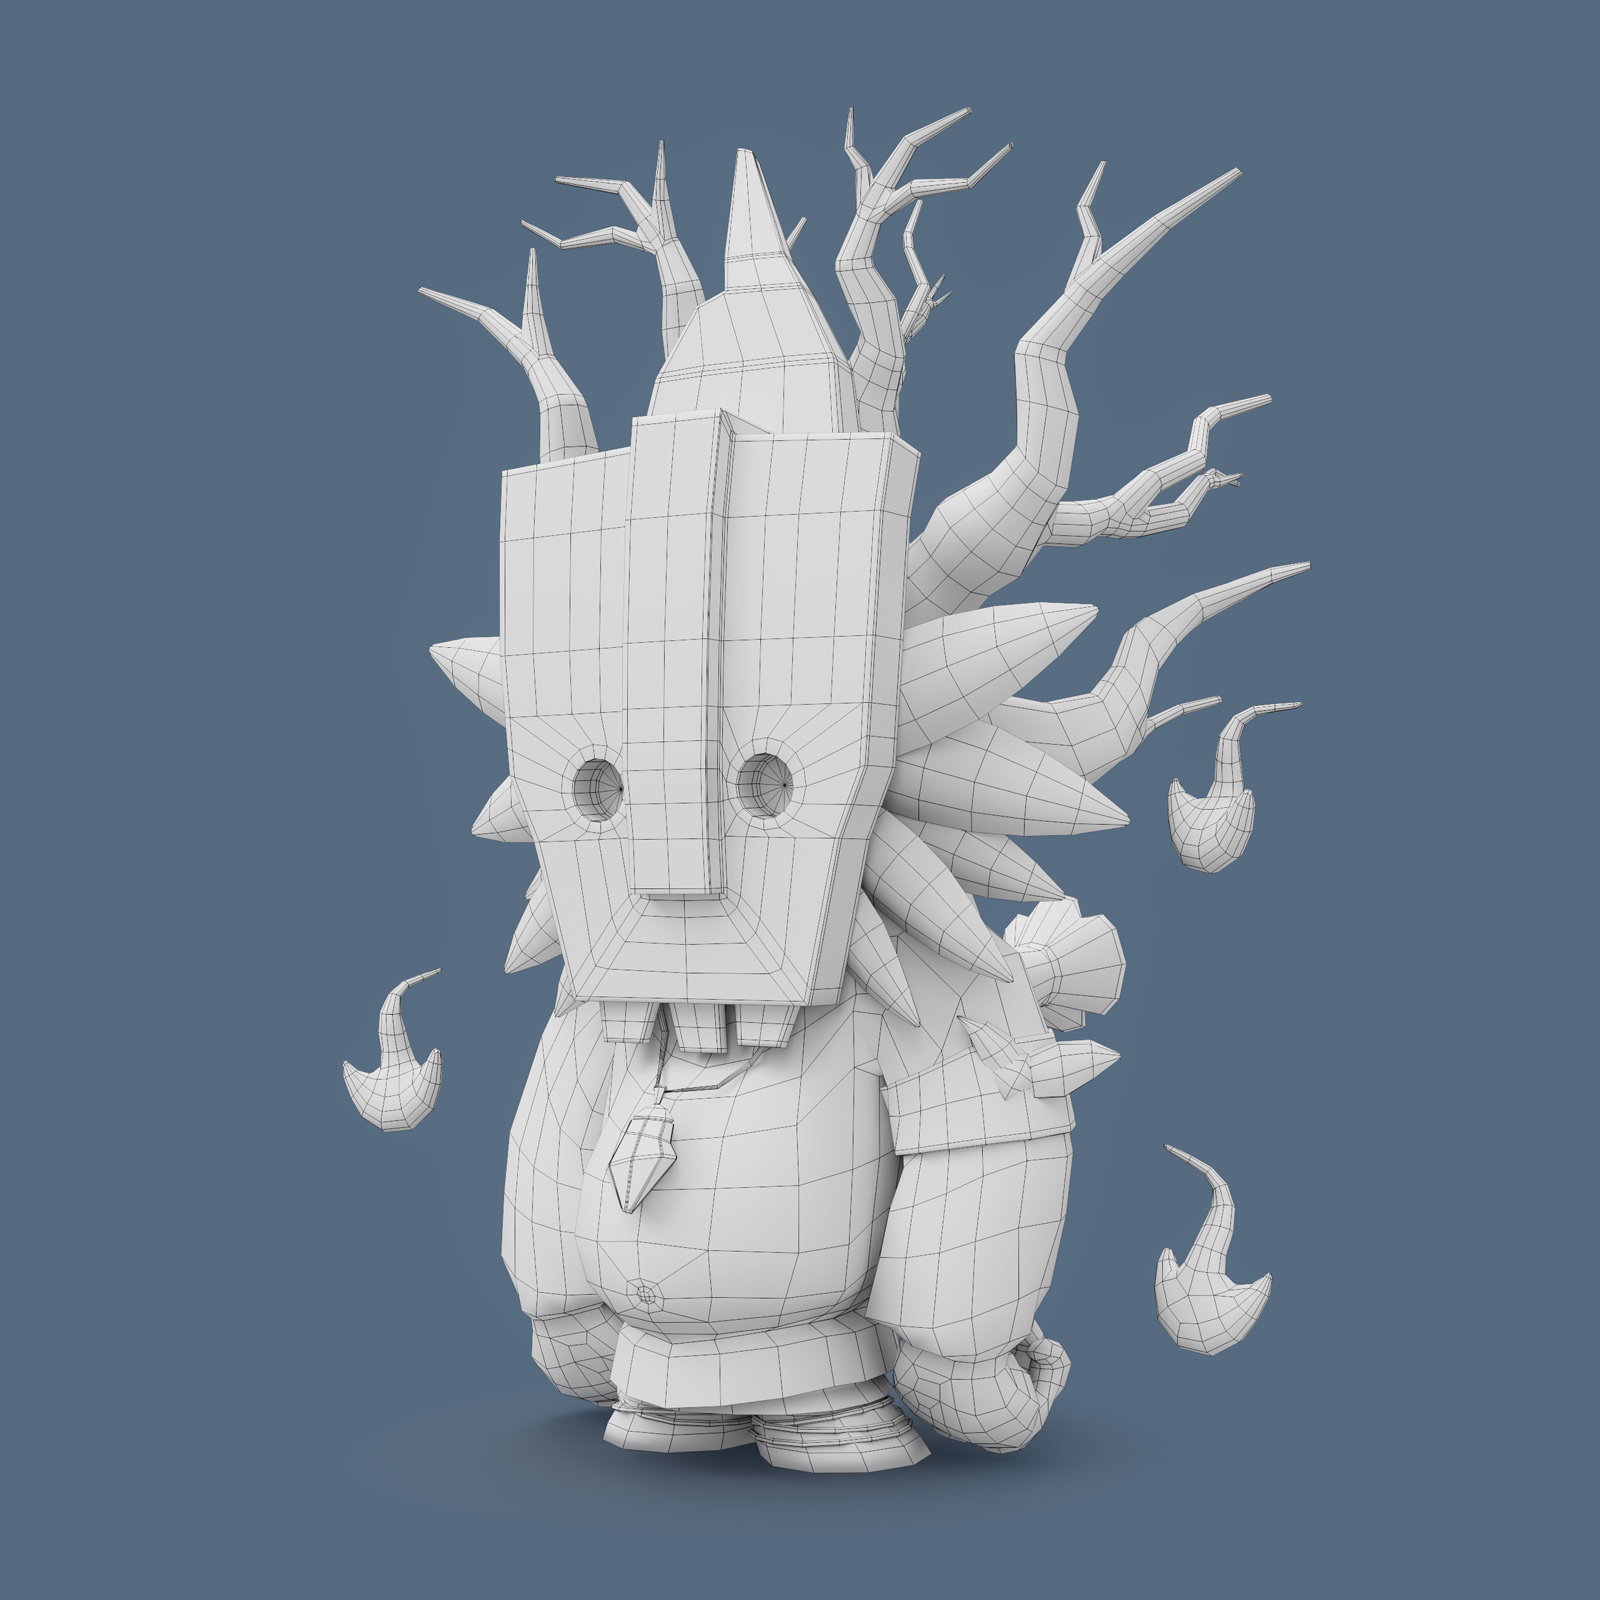
I wanted to try Blender for a long time. And came across a series of tutorials from YouTube channel Blender 3d. After watching it became clear why so many people love this free software.
I started in Blender, but then jumped back into Houdini. With plugin called Modeler, you can repeat the steps without problems.
Here is a “turntable” and then a speedup walkthrough:

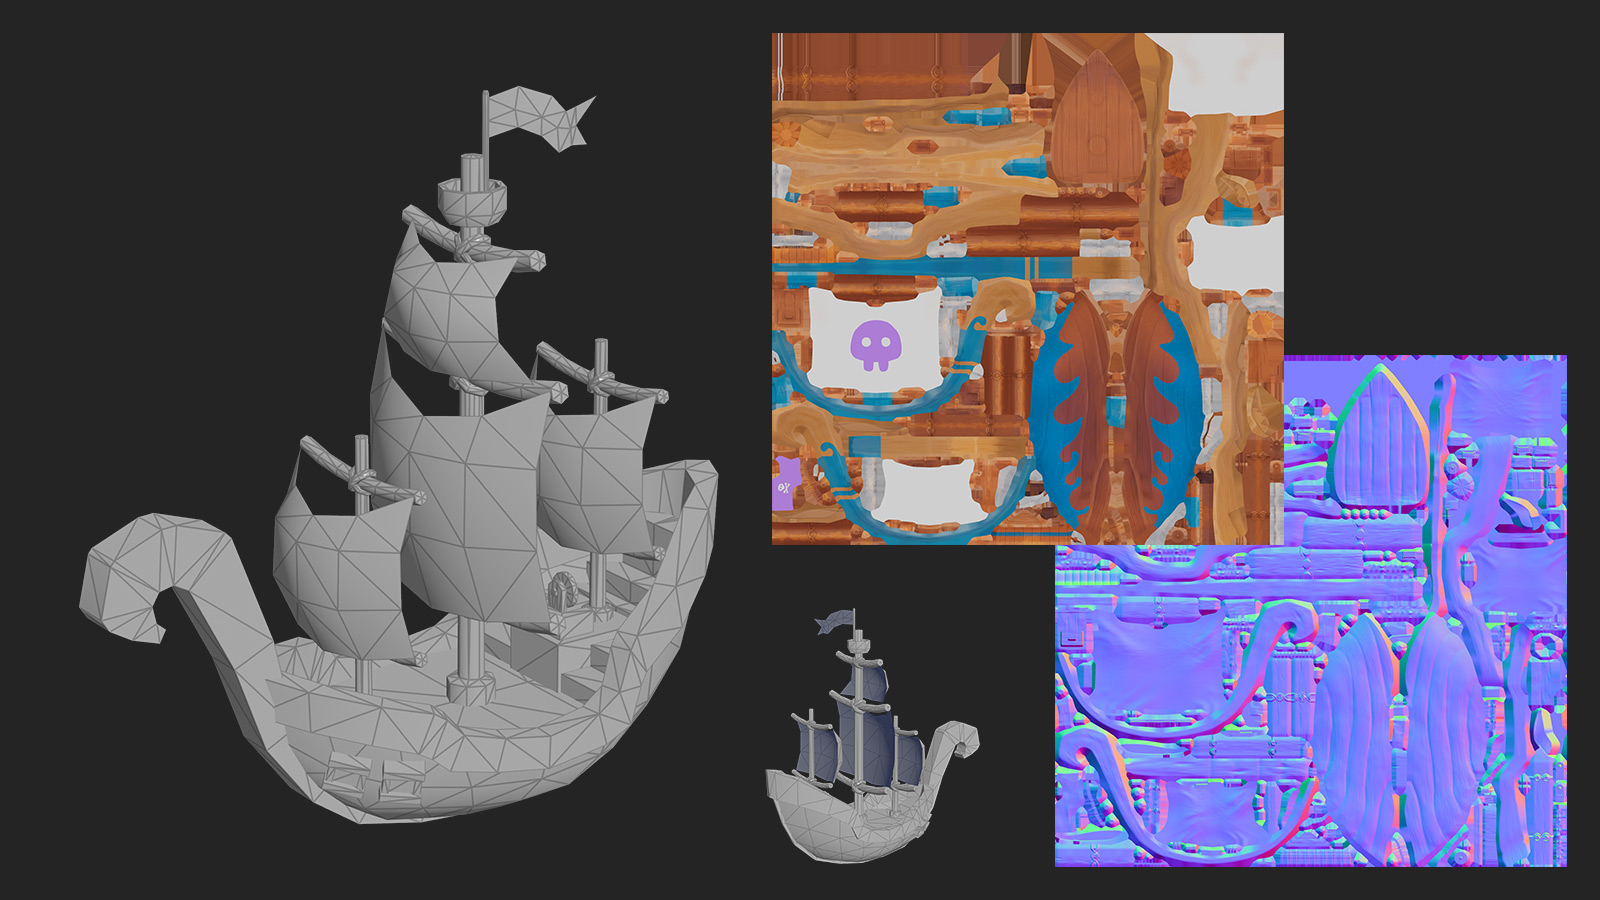
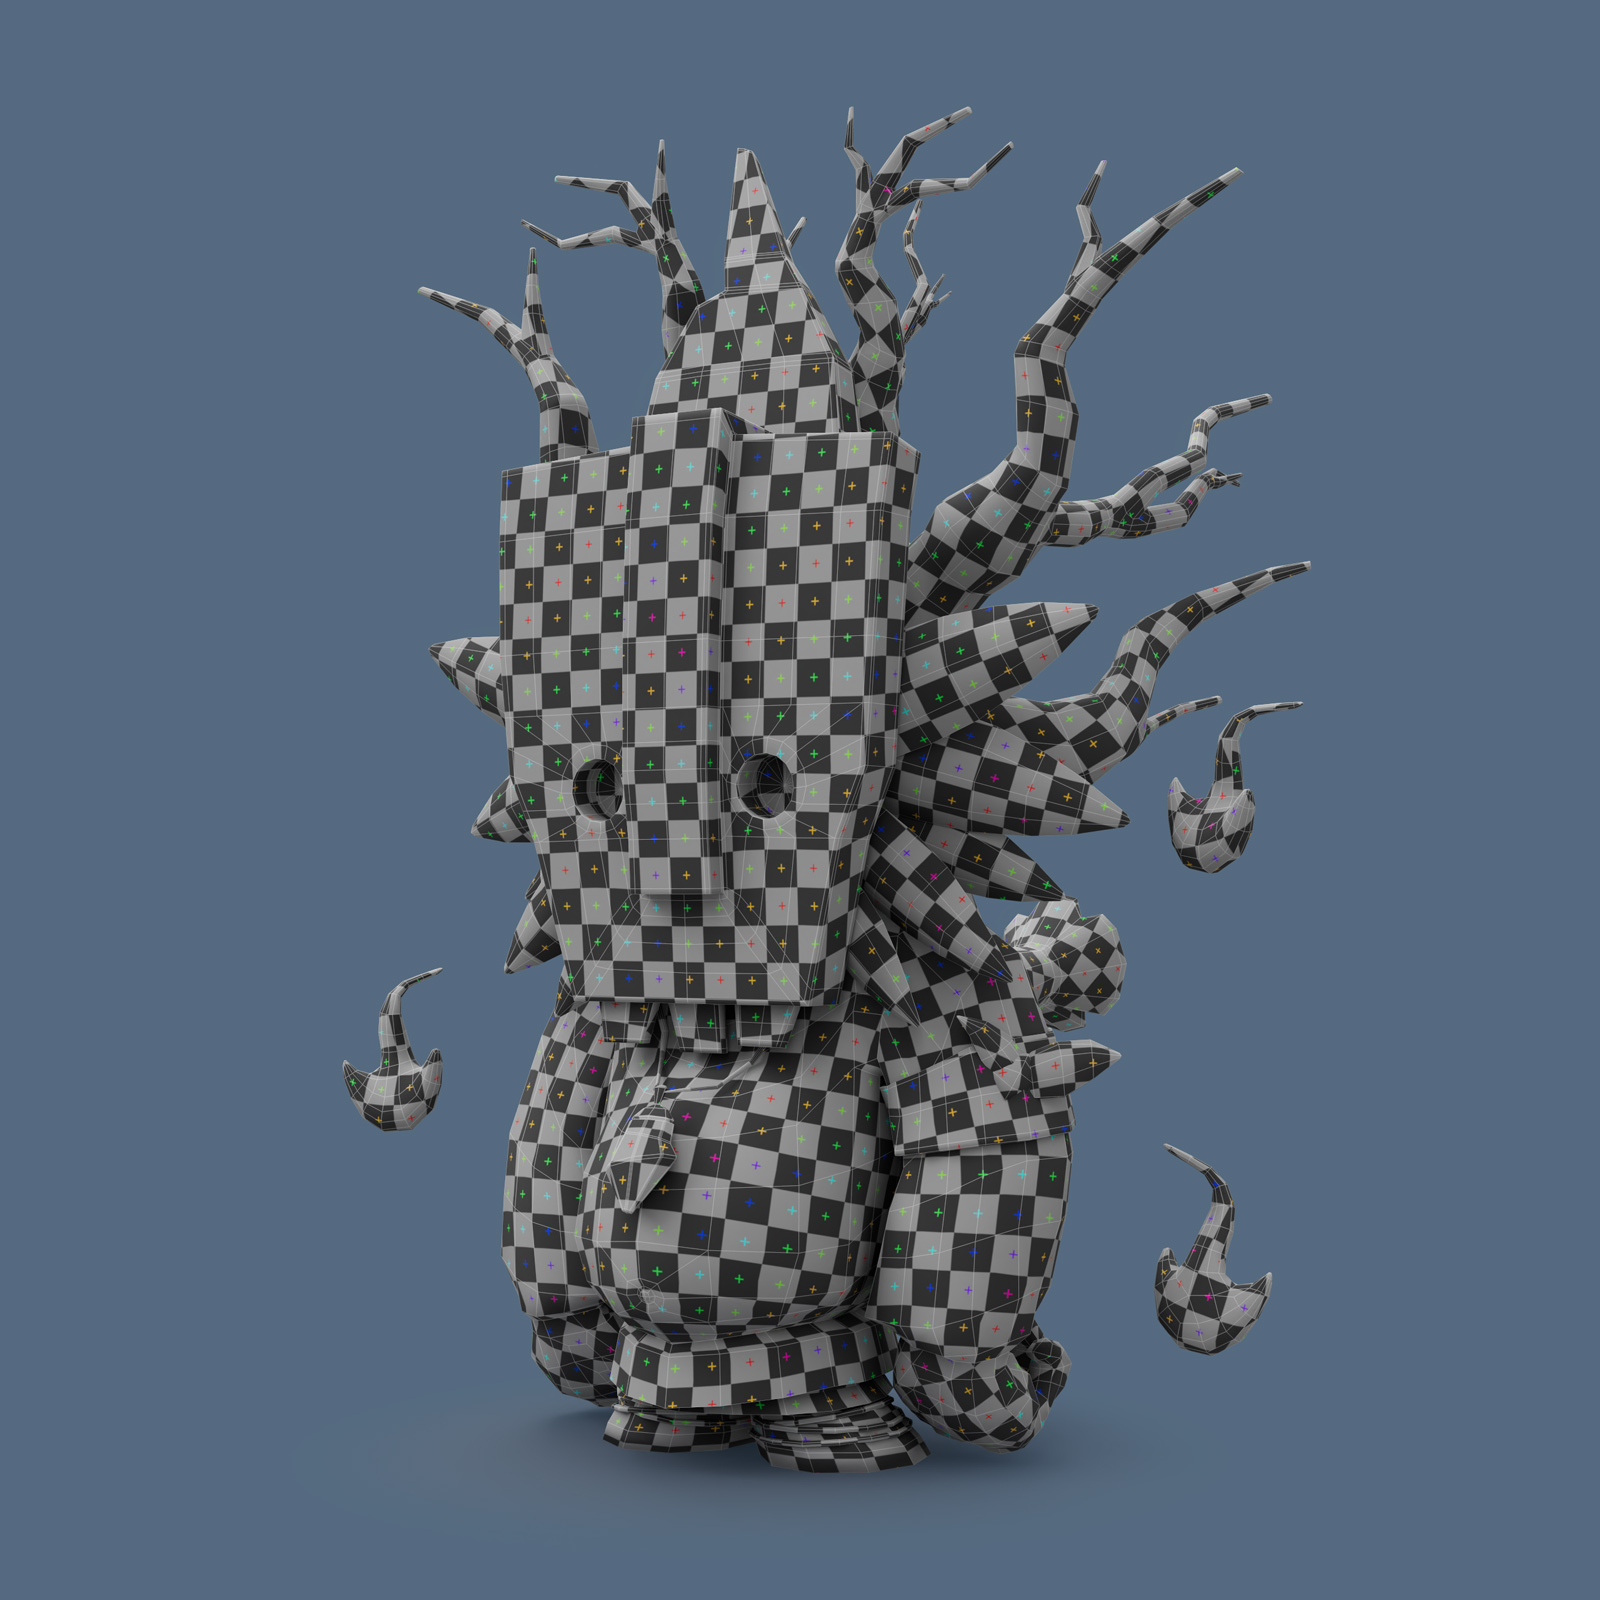
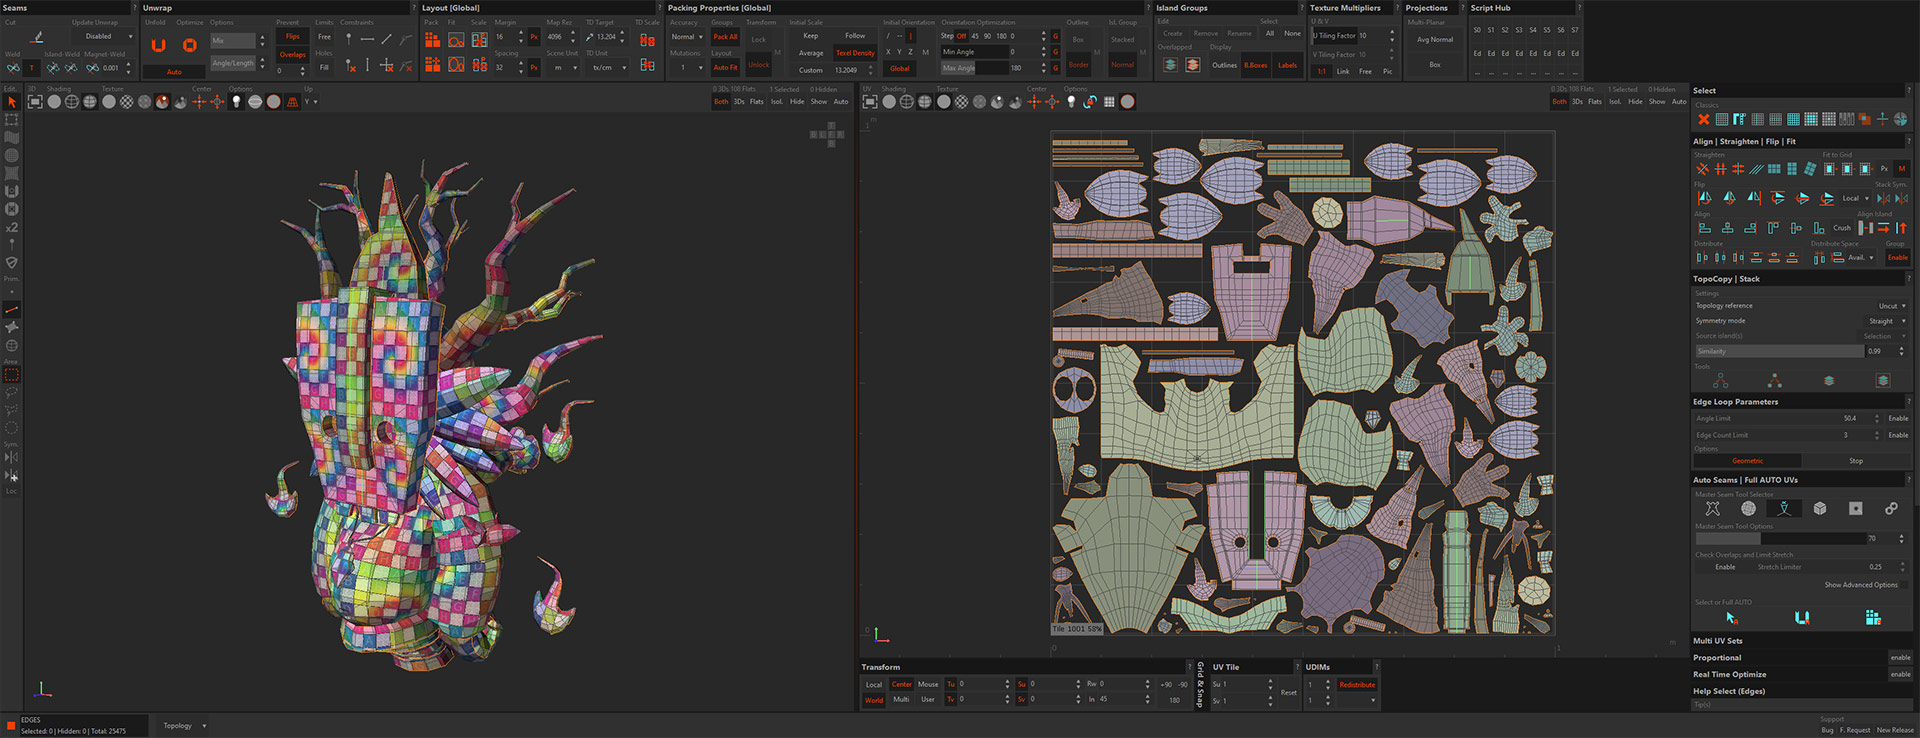
UVs I did in RizomUV. They have just released an update. And now you can insert one group into another. For example, a group of “feathers” can be included in the “head” group and packed together. One of my favorite tricks: you can pack the islands using their direction in 3D space. Want everything to be aligned by Y in UV space? Just a click of a button. By the way, the groups made in Houdini are visible in Rizom.

After UVing, I imported some groups into Zbrush to add details.
I baked from high to low in Marmoset. It also understands groups from Houdini, and therefore it is not necessary to export the “exploded” mesh separately, as it is usually done for baking in Substance. Another nice thing about it is the auto-reload of textures and geometry. If you change something in another program and save, Marmoset automatically shows those changes.
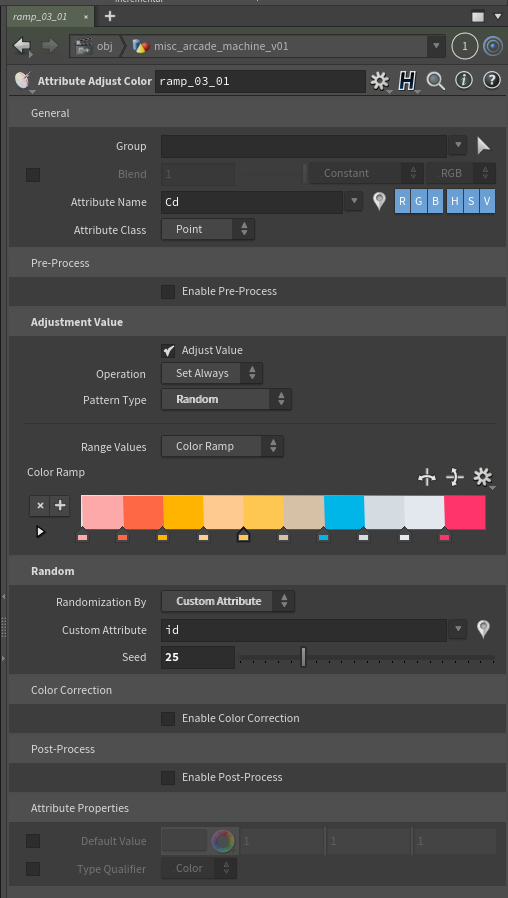
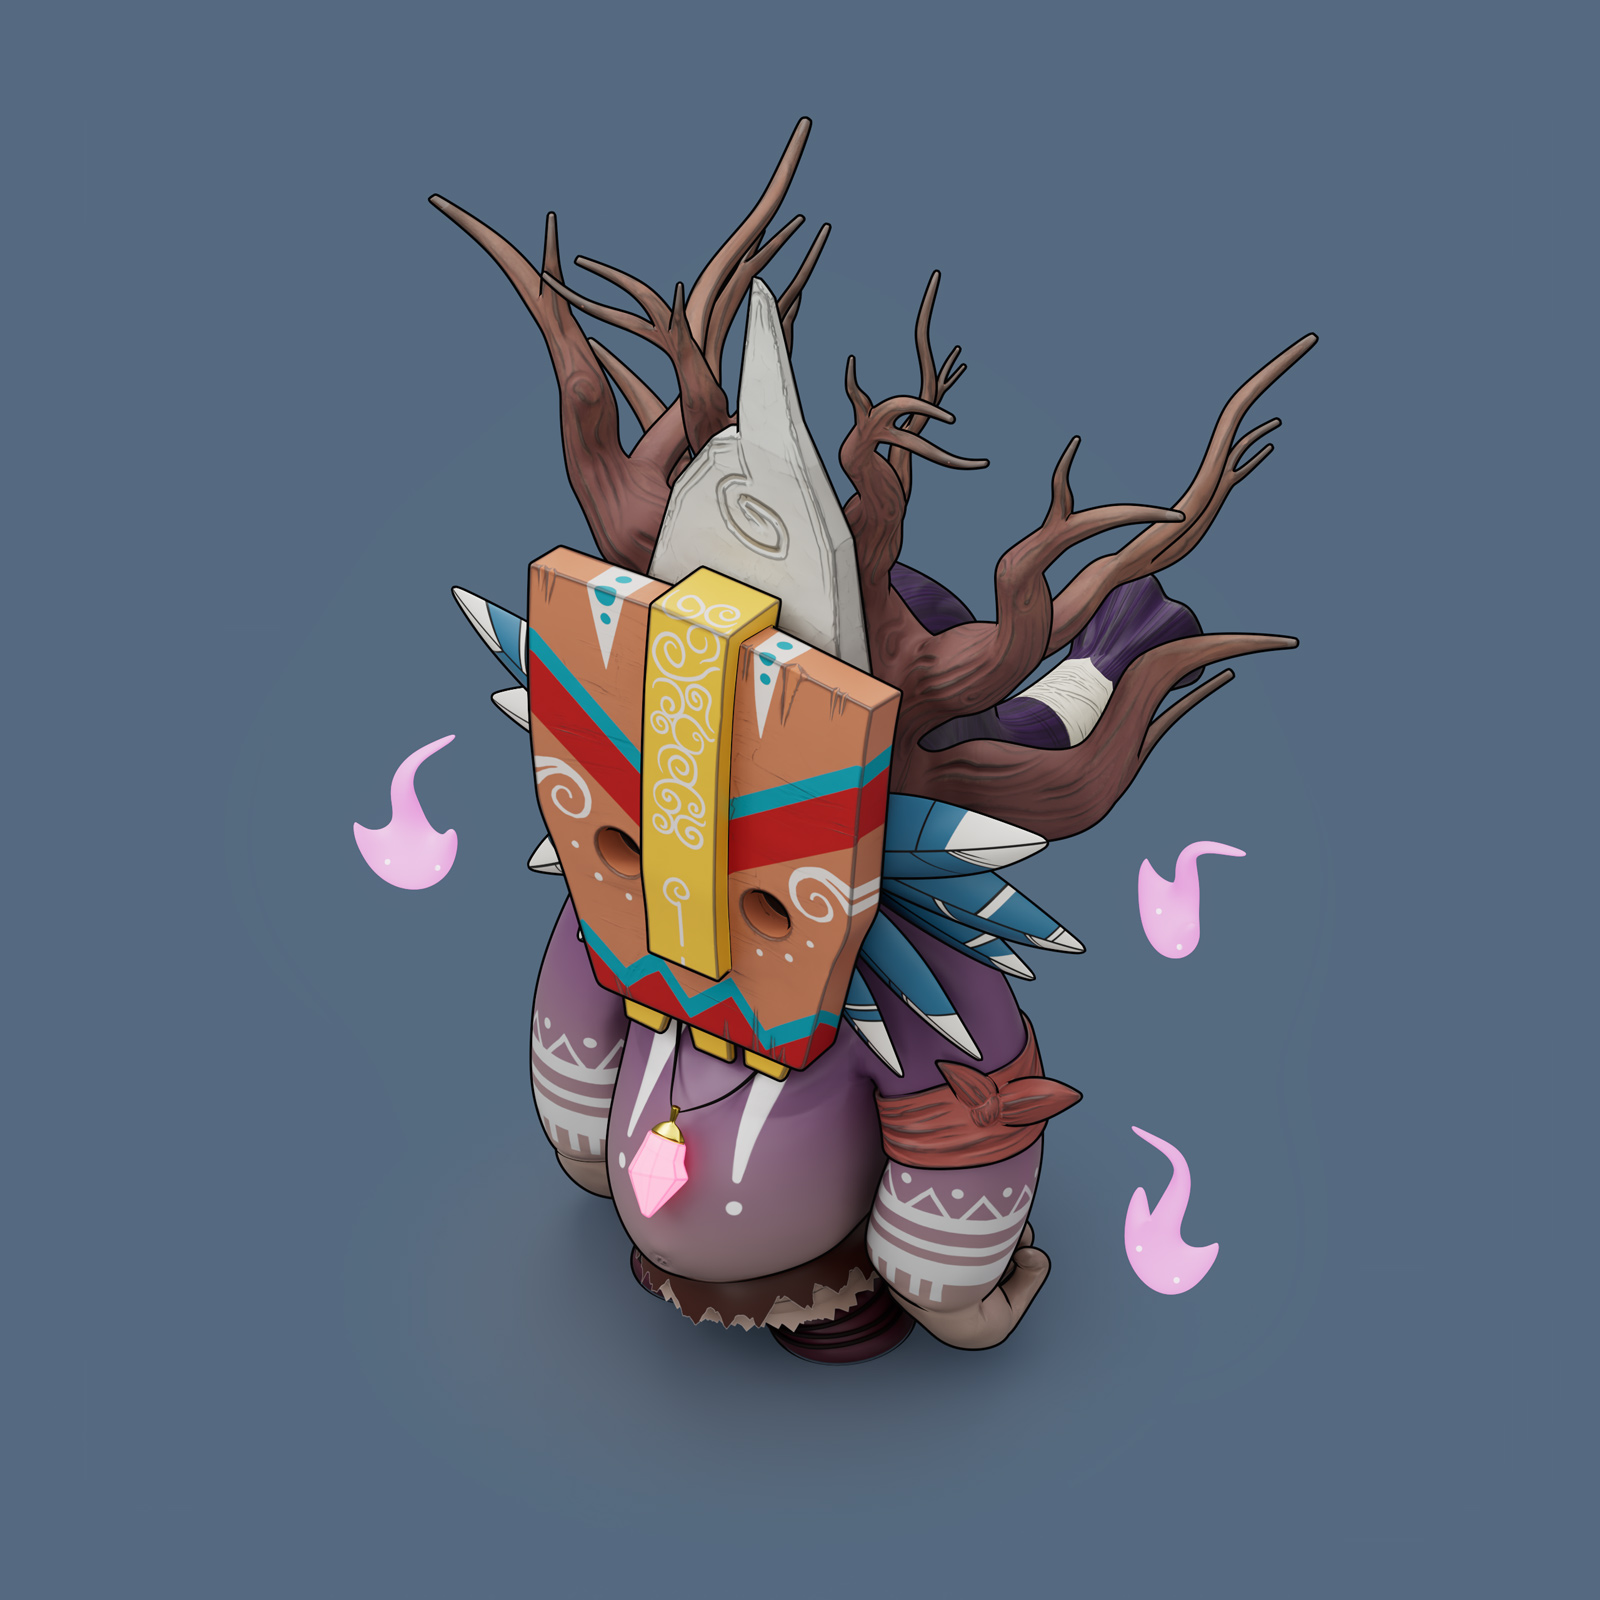
I textured in Substance Painter. Then I rendered in Houdini with Redshift.

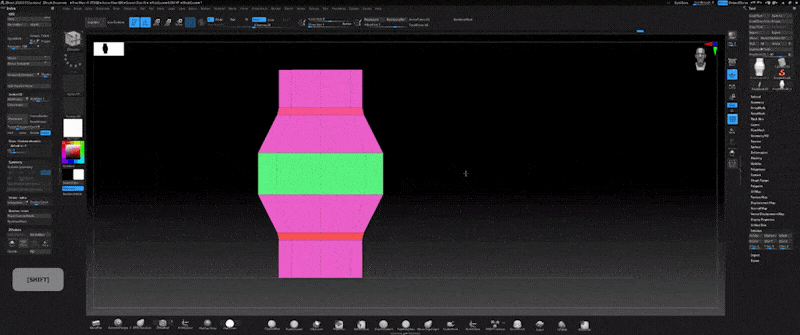
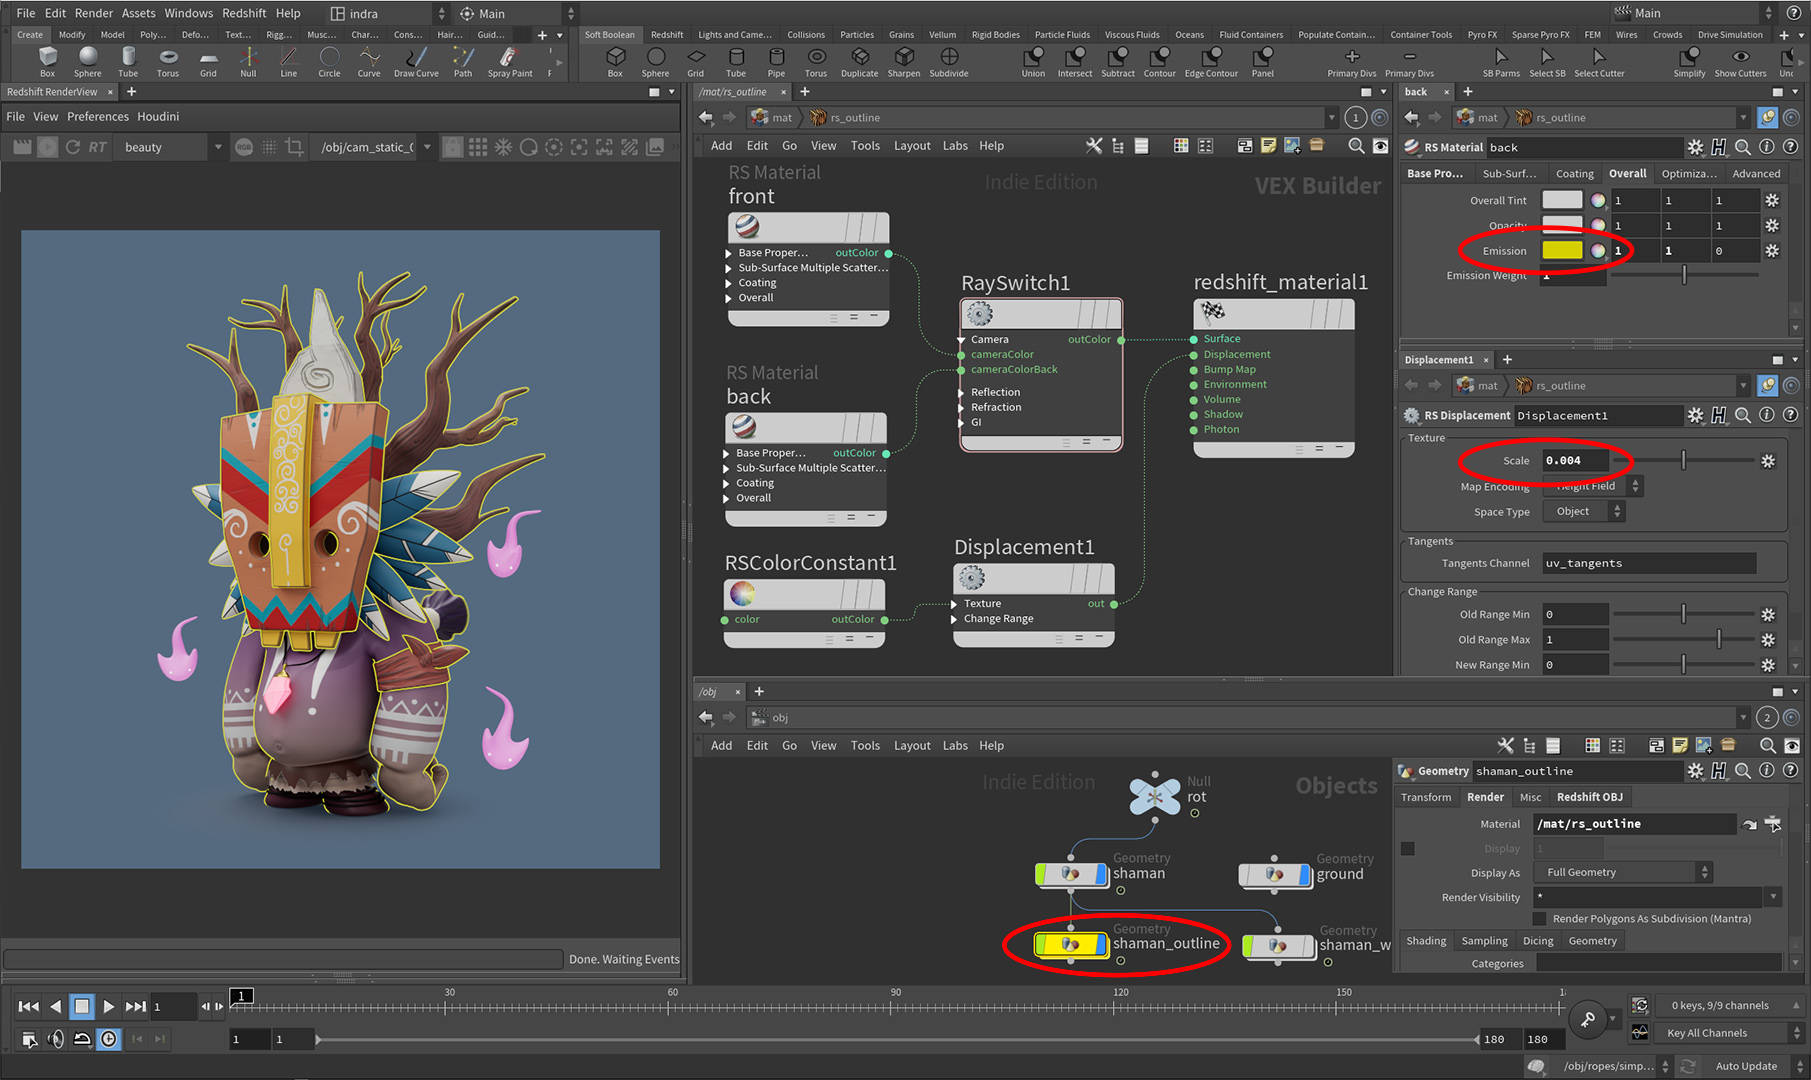
To make the cartoon outline: I cloned geometry. Assigned double-sided material to it. The “front” is transparent, and the “back” has only black emission material assigned to it. Then you add displacement with a constant instead of a texture. And that’s it. You can control the thickness of the line with the amount of displacement. And color of line with emission (yellow in this example):

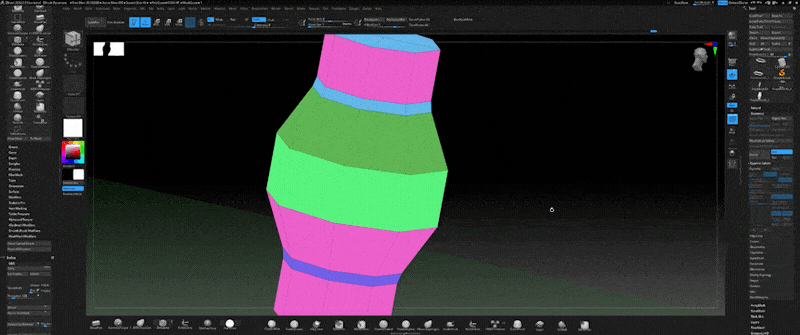
Then I repeated the same trick in Marmoset. It works when rendering. But displacement is not supported in the “viewer”. So if you want to send a link to the client, so he can rotate the model in the browser you need another approach:
I exported additional geometry from Houdini, but with reversed normals and a bit inflated with “Peak” node. Then in Marmoset I assined a new dark material without reflections, and set the Diffusion module to Unlit.

Here is the result that you can rotate:

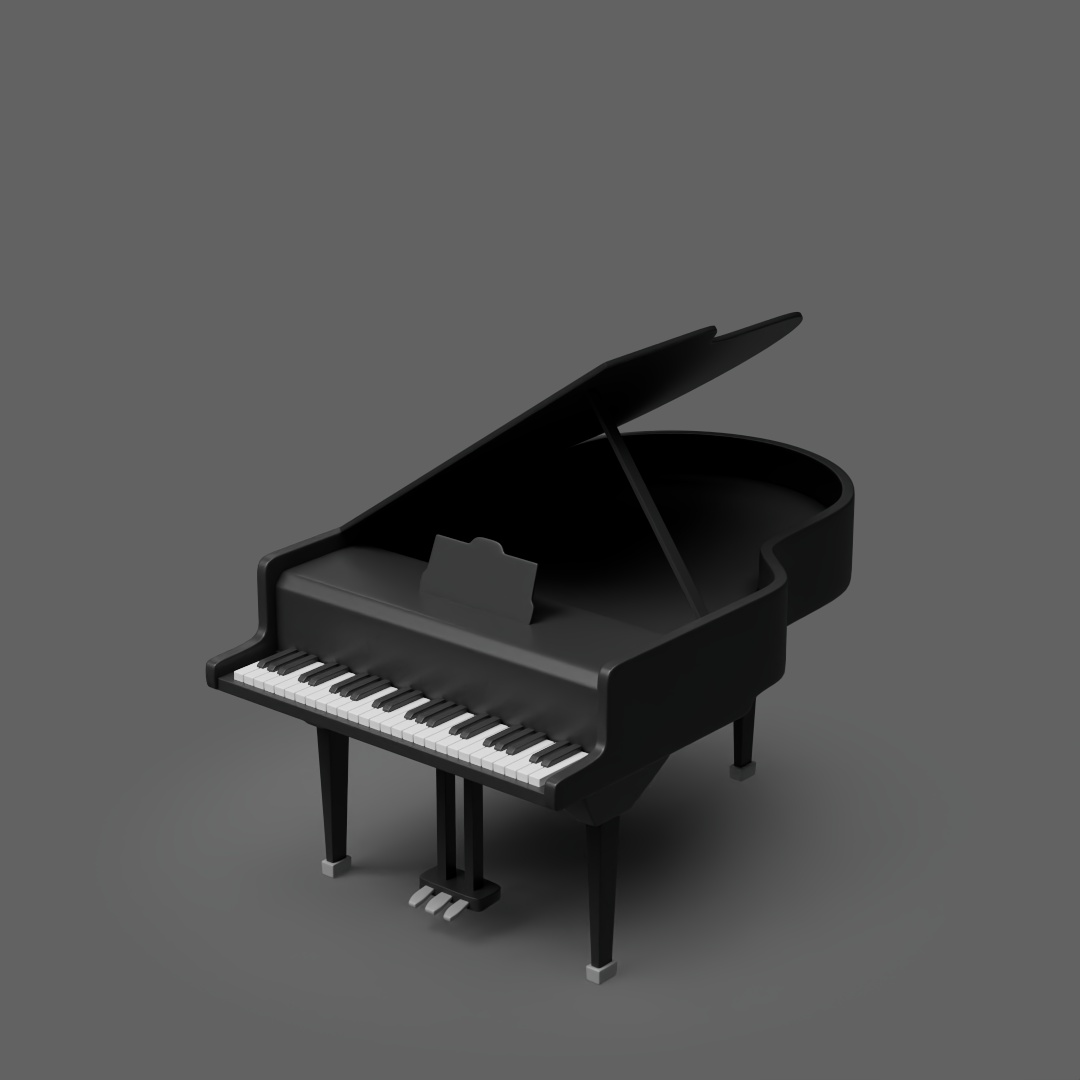
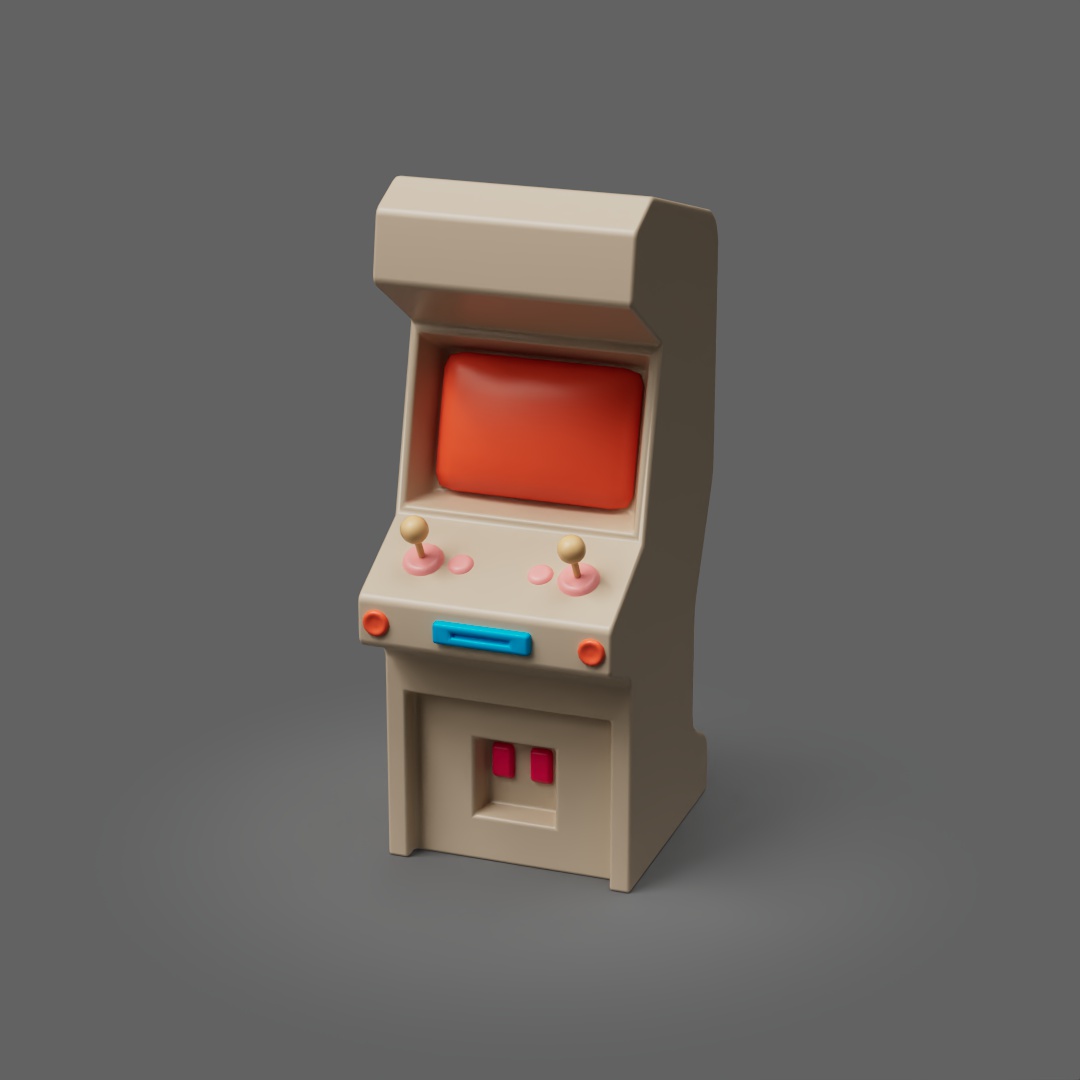
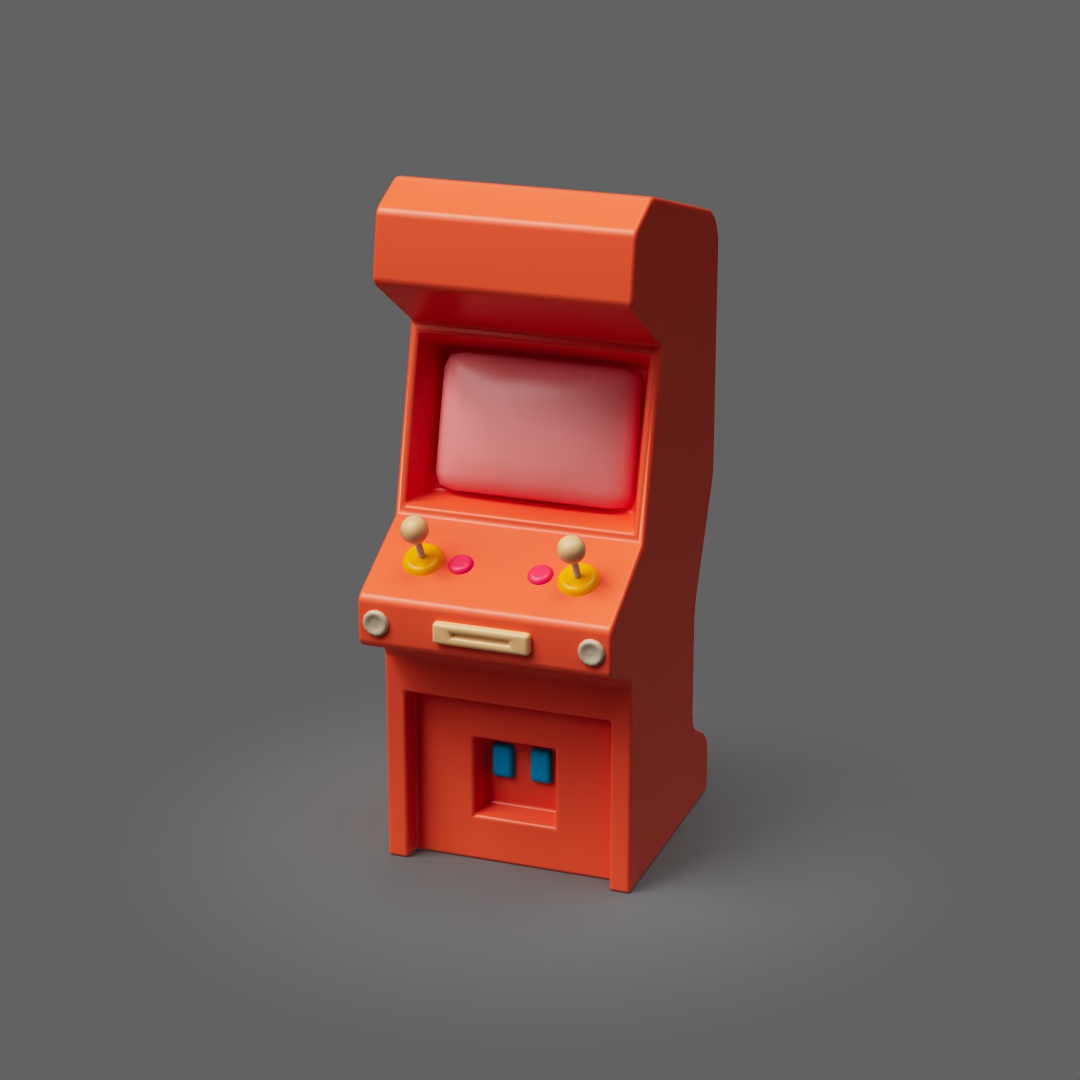
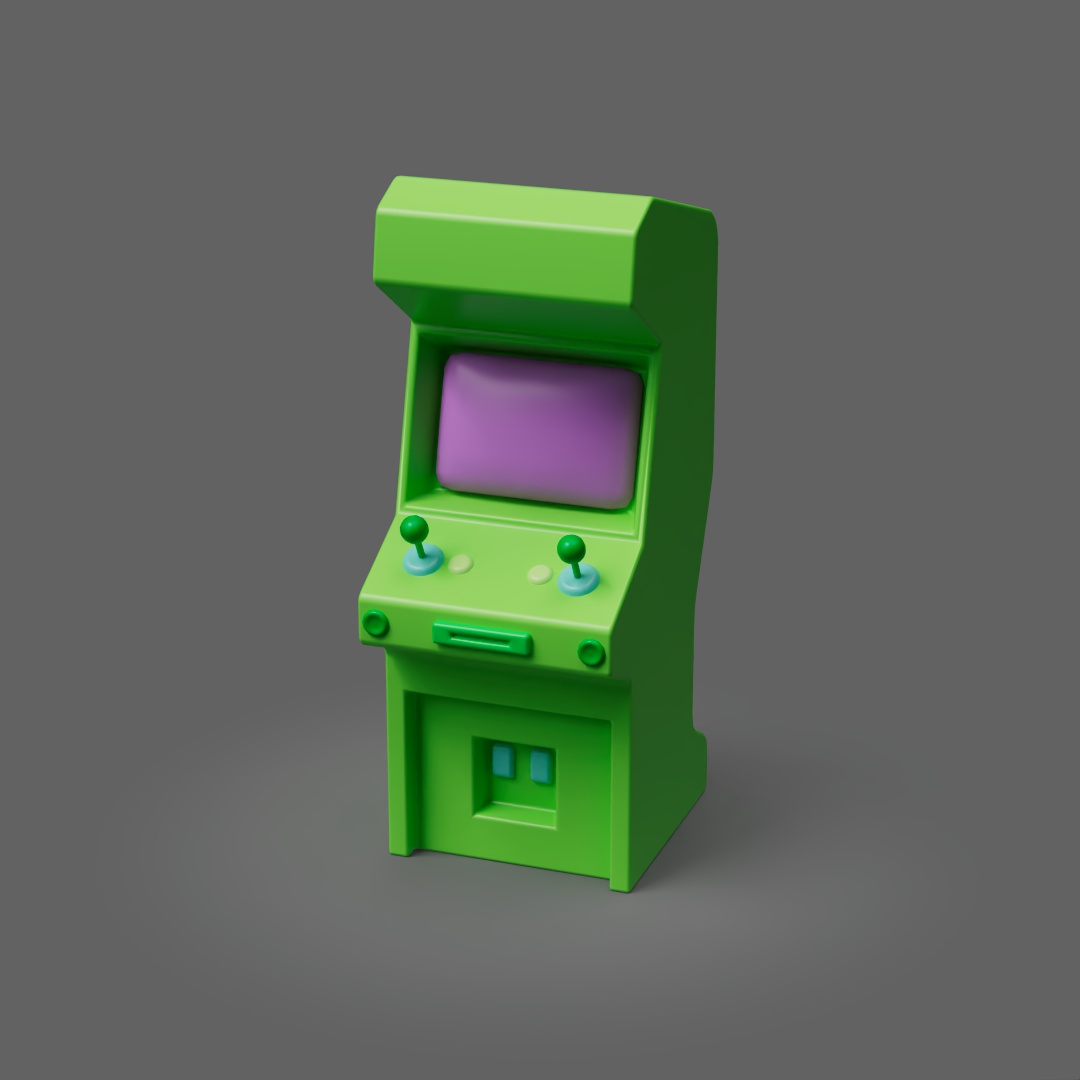
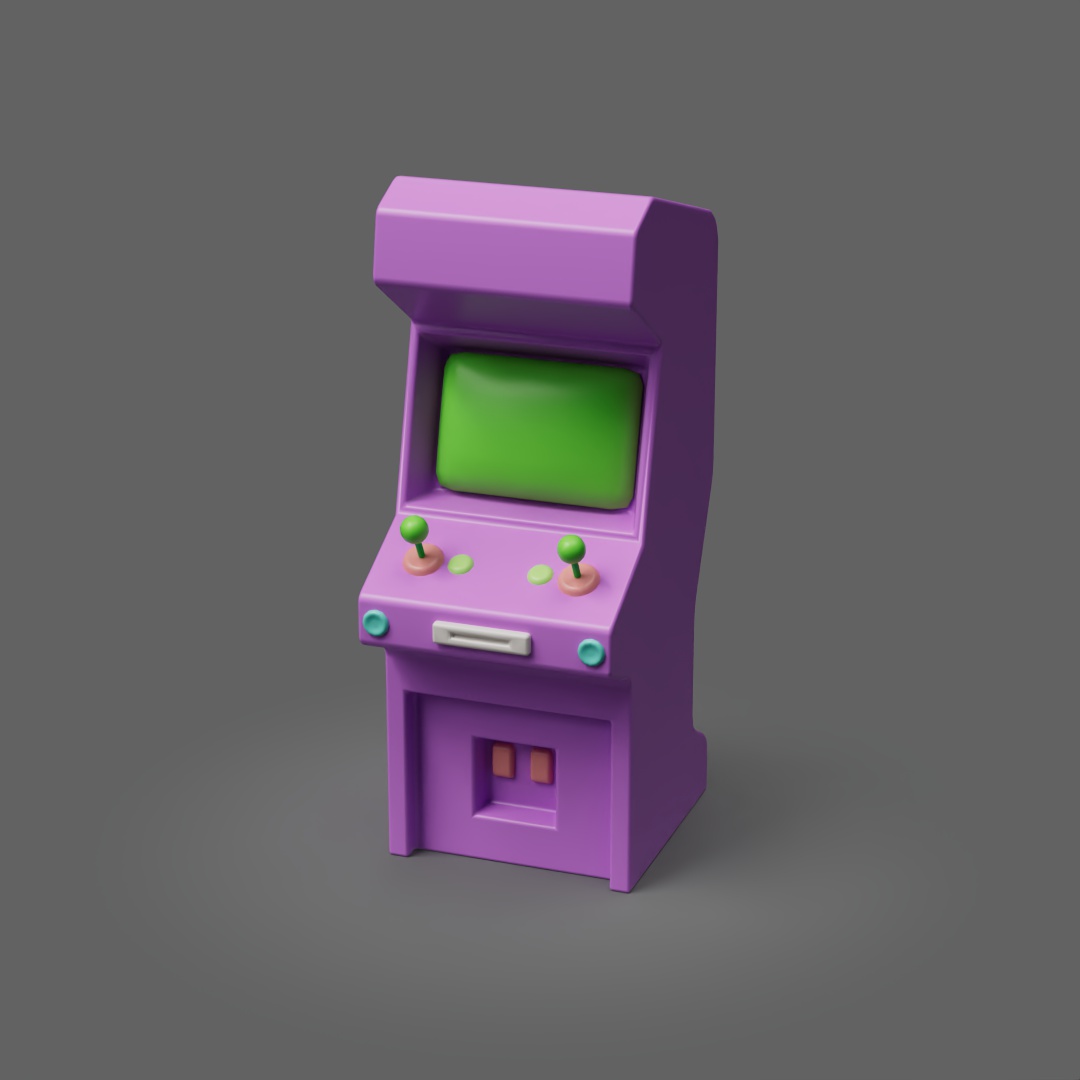
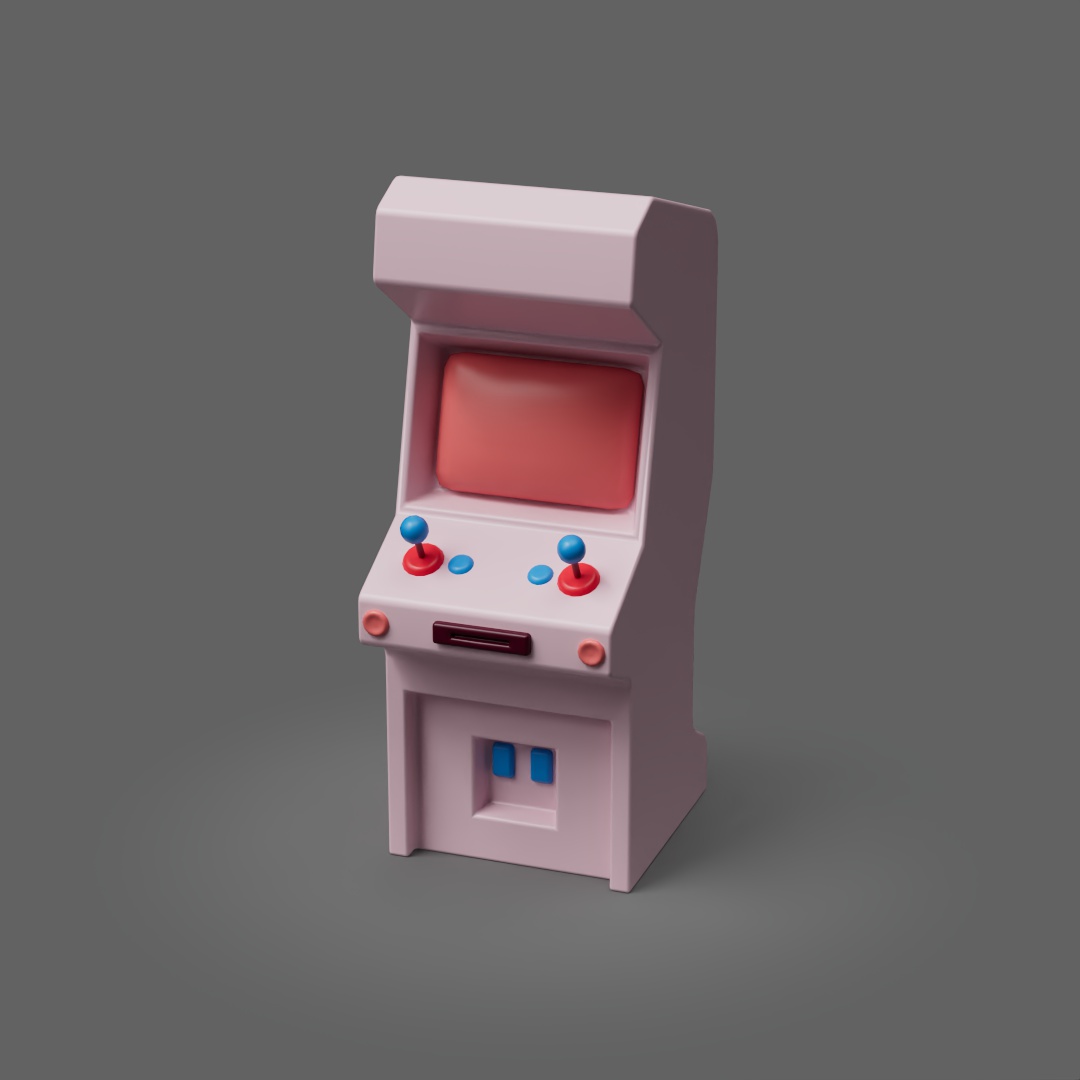
And couple more renders from Redshift:

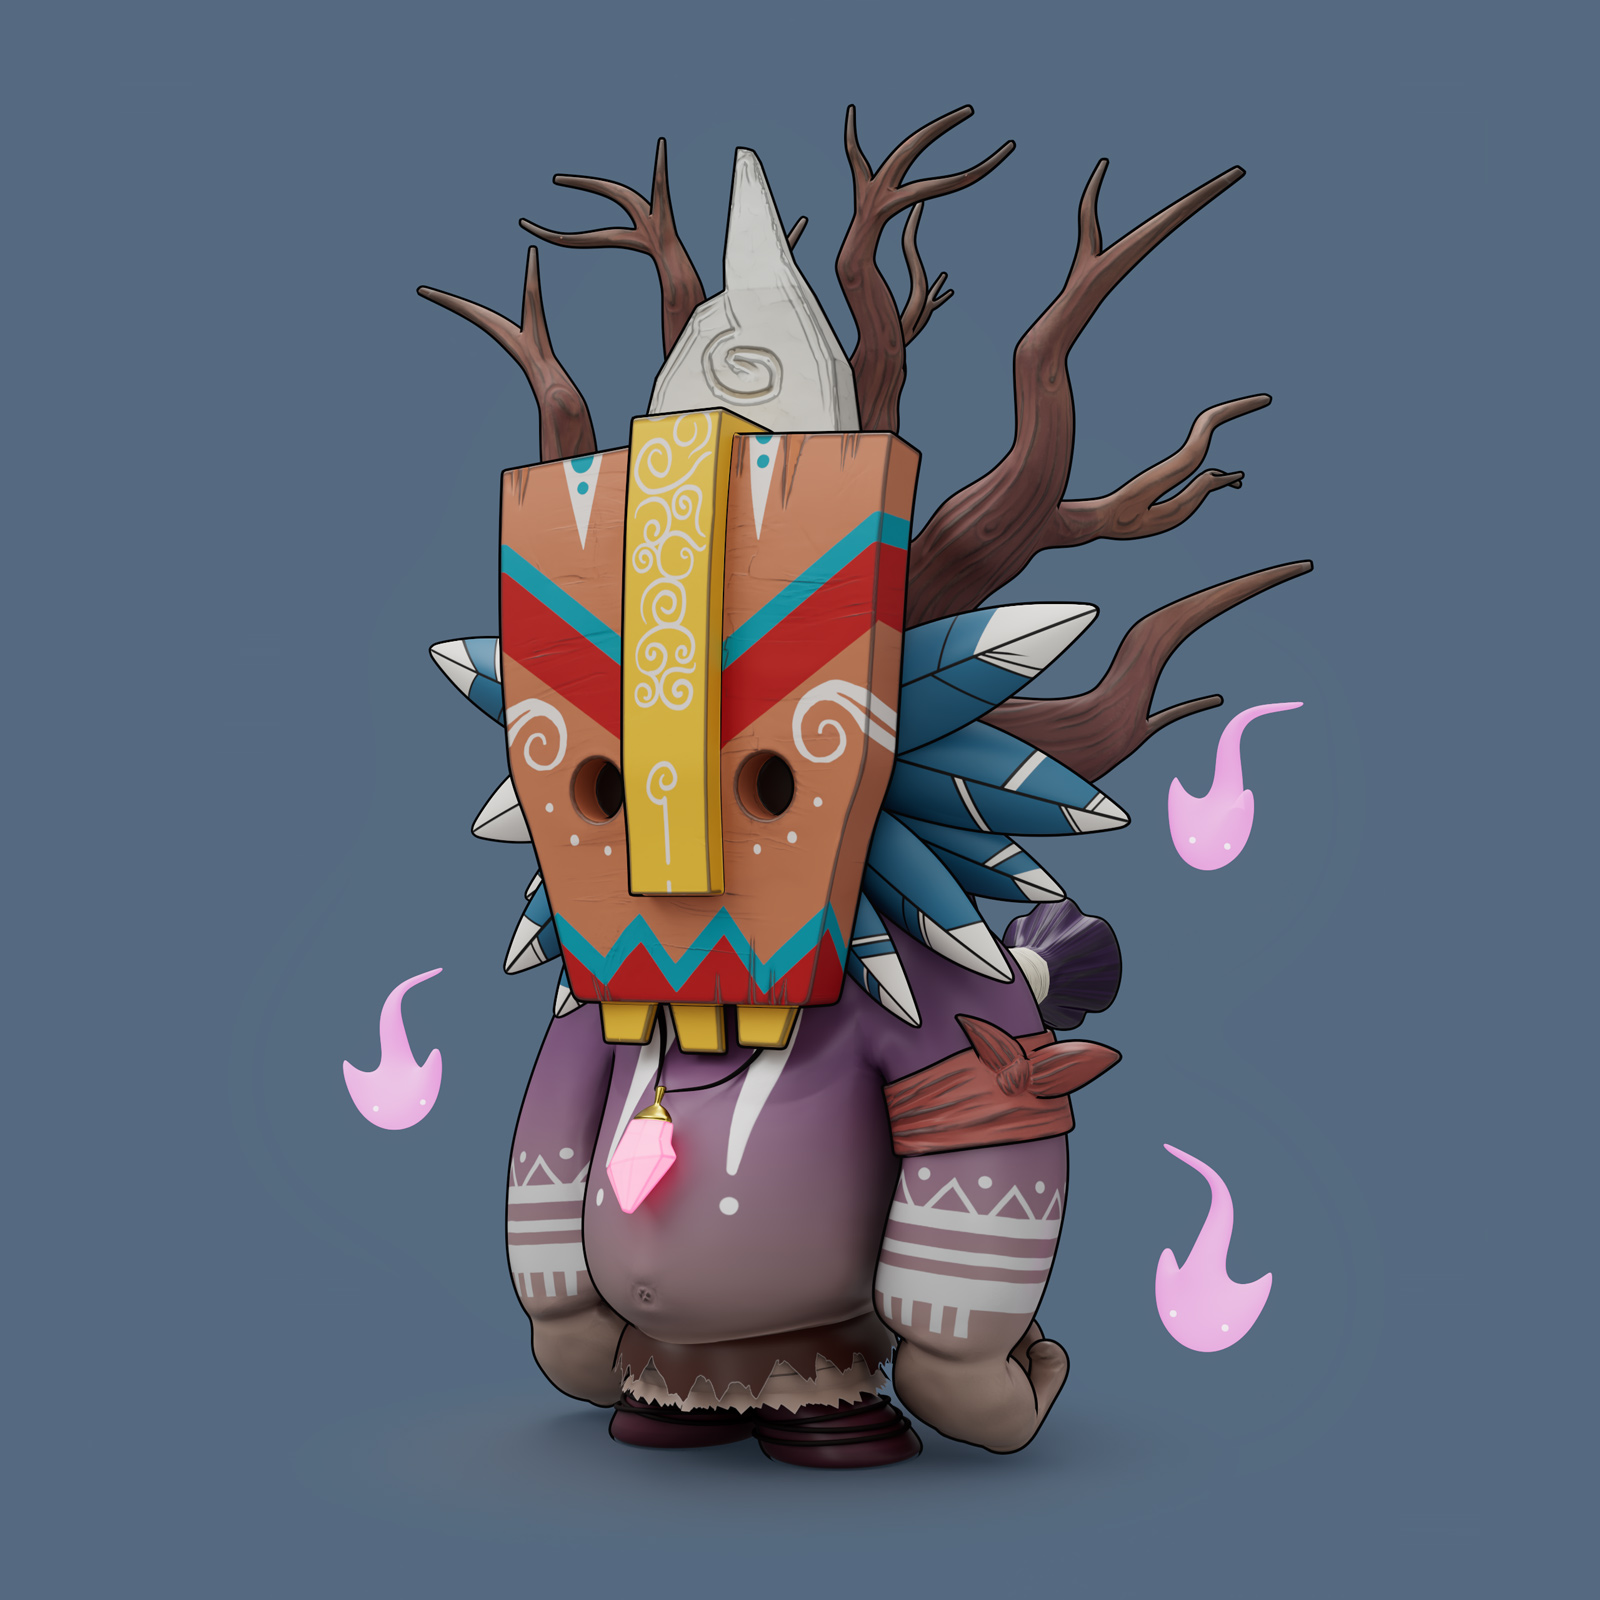
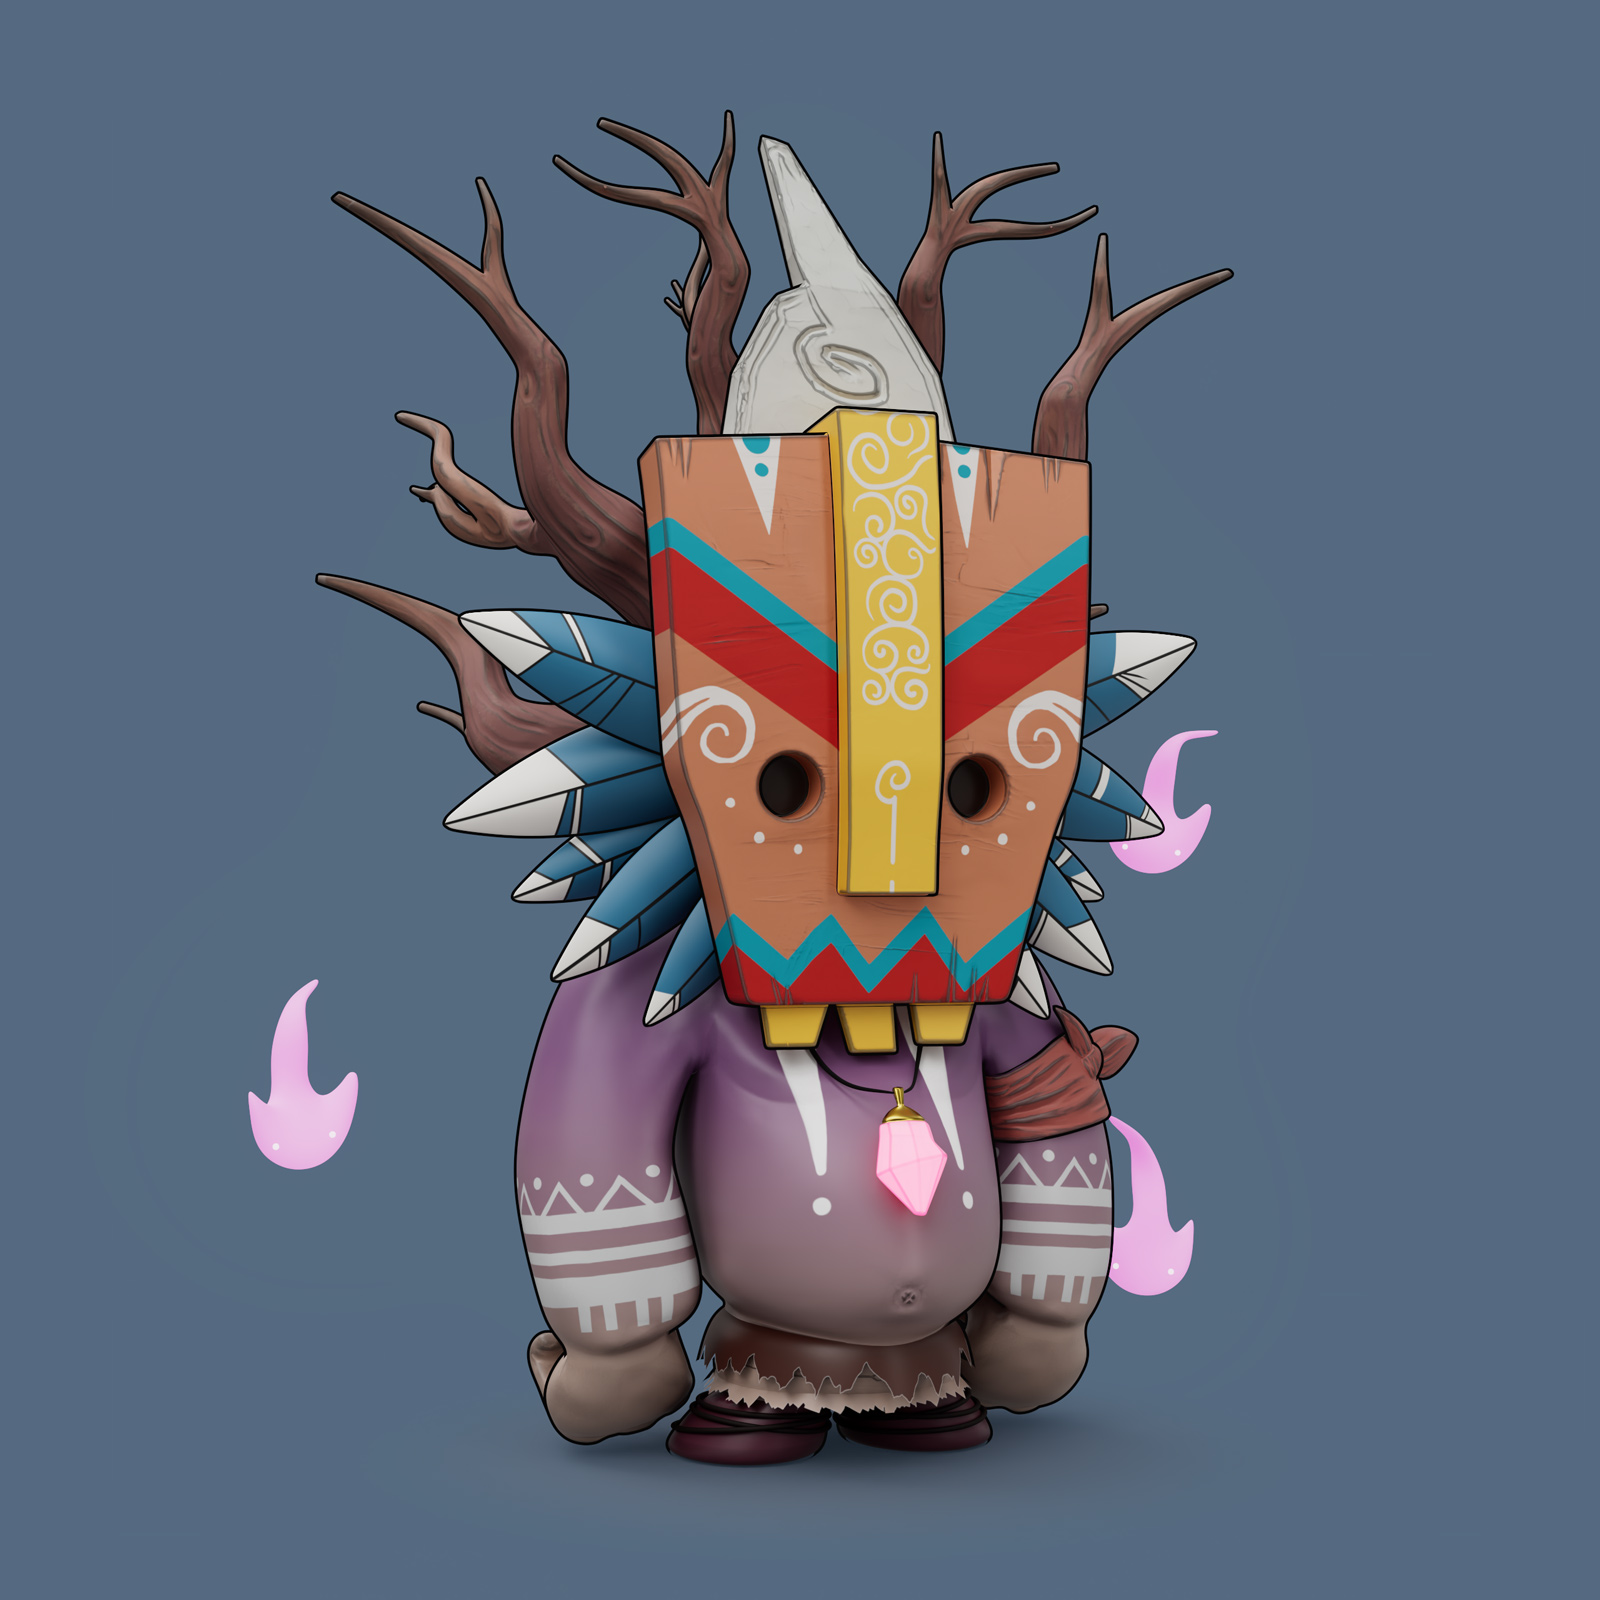
Original concept drawing was made by amazing La Foret Oublie.
And here is a great article on shading in Marmoset.

 1526   2021   3dmodeling   blender   houdini   panama   redshift

Panama – Playa Caracol

I’m trying to figure out how to live on both Windows and MacOS at the same time. For the sake of a little test I took some vieos with a selfie stick. I threw it on Windows in Davinci 17 (a free program for working with videos). In version 17 they added a button to search for “lost” files. I’ve sent the project without videos via dropbox to a M1 Macbook and added music on my Mac. In order not to send the entire project, you can now export only the “timeline”. It weighs almost nothing so you can send it even via the phone. Opened it on Windows – everything just works.

 762   2021   panama
 1248   2021   animation   houdini
Earlier Ctrl + ↓